Most knitting projects take more than one sitting to complete. And if we don't store our project in progress properly, it can succumb to many problems that will make it more difficult for us to pick it back up again later. In this article, I will share my tricks to keep my projects sane and easy to pick back up again. This is also effective for when you are like me, and have to have several projects going at the same time. (In a future article, I'm also going to talk about how to optimize your knitting project for travel.) These tips go in order, starting with the quickest/simplest and advancing from there depending on your level of compulsion. Feel free to comment if there is something you do that I left out!
1. Protect it from Pets
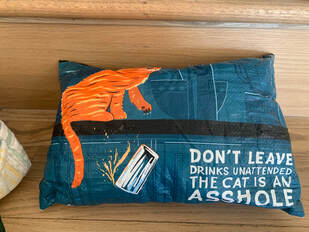
Many of us fiber fans are also fans of furry friends or have big furry families. Sometimes our furry friends also find interest in our fiber, and unfortunately that can lead to disastrous results if we are not careful. (Ex: old story of a pet disaster from Ravelry; warning: a little gross). One thing I remind all of my knitting students is to properly store our knitting to protect it from furry friend curiosities. This can really be as simple as putting it away in a safe location, where our pets can't access it. Whether you have cats, dogs, ferrets or other pets who freely roam your household, it might be a good idea to not just leave the project sitting on the couch.
1. Protect it from Pets
Many of us fiber fans are also fans of furry friends or have big furry families. Sometimes our furry friends also find interest in our fiber, and unfortunately that can lead to disastrous results if we are not careful. (Ex: old story of a pet disaster from Ravelry; warning: a little gross). One thing I remind all of my knitting students is to properly store our knitting to protect it from furry friend curiosities. This can really be as simple as putting it away in a safe location, where our pets can't access it. Whether you have cats, dogs, ferrets or other pets who freely roam your household, it might be a good idea to not just leave the project sitting on the couch.
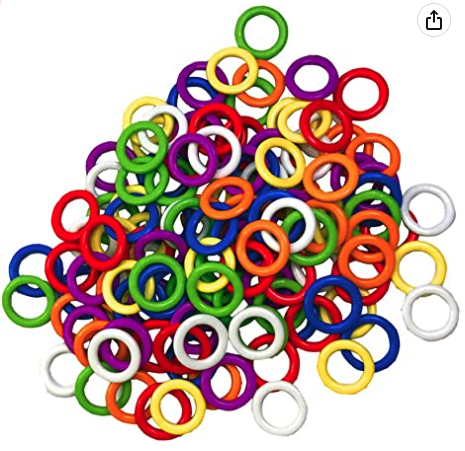
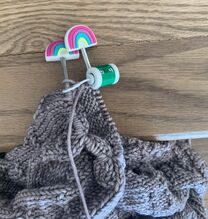 I adore these rainbow point protectors!
 2. Keep the stitches on the needles
A common issue that I see beginners have, is they have yet to grok the importance of keeping the stitches on the needles. This can lead to mistakes in the process of knitting (i.e. dropped sts, etc), but it can also happen when the project isn't being actively worked on. I don't know if it is the gnomes or what, but if you don't secure your sts on your needles when storing a project, they are at risk of falling off the needles. This is not a fun way to pick a project back up again - having to do restoration. Fortunately, there are some beautiful tools that help out in this purpose (and you know I love my tools!). Point protectors - simply secure these rubber devices on the points of your needles, and go forward with confidence that your yarn won't slip off. I have seen knitters (and ok, personally done this myself as well) where instead I just shove the points of the needles into my ball of yarn when storing. As long as you push the stitches towards the blunt end of straight needles, or move the stitches towards the center of your circular needle, and pull the points out further, this can be an ok method. But it would only be a backup to utilizing point protectors. And now they come in all sorts of fun and cute styles - so why wouldn't we use them?
A common issue that I see beginners have, is they have yet to grok the importance of keeping the stitches on the needles. This can lead to mistakes in the process of knitting (i.e. dropped sts, etc), but it can also happen when the project isn't being actively worked on. I don't know if it is the gnomes or what, but if you don't secure your sts on your needles when storing a project, they are at risk of falling off the needles. This is not a fun way to pick a project back up again - having to do restoration. Fortunately, there are some beautiful tools that help out in this purpose (and you know I love my tools!). Point protectors - simply secure these rubber devices on the points of your needles, and go forward with confidence that your yarn won't slip off. I have seen knitters (and ok, personally done this myself as well) where instead I just shove the points of the needles into my ball of yarn when storing. As long as you push the stitches towards the blunt end of straight needles, or move the stitches towards the center of your circular needle, and pull the points out further, this can be an ok method. But it would only be a backup to utilizing point protectors. And now they come in all sorts of fun and cute styles - so why wouldn't we use them?

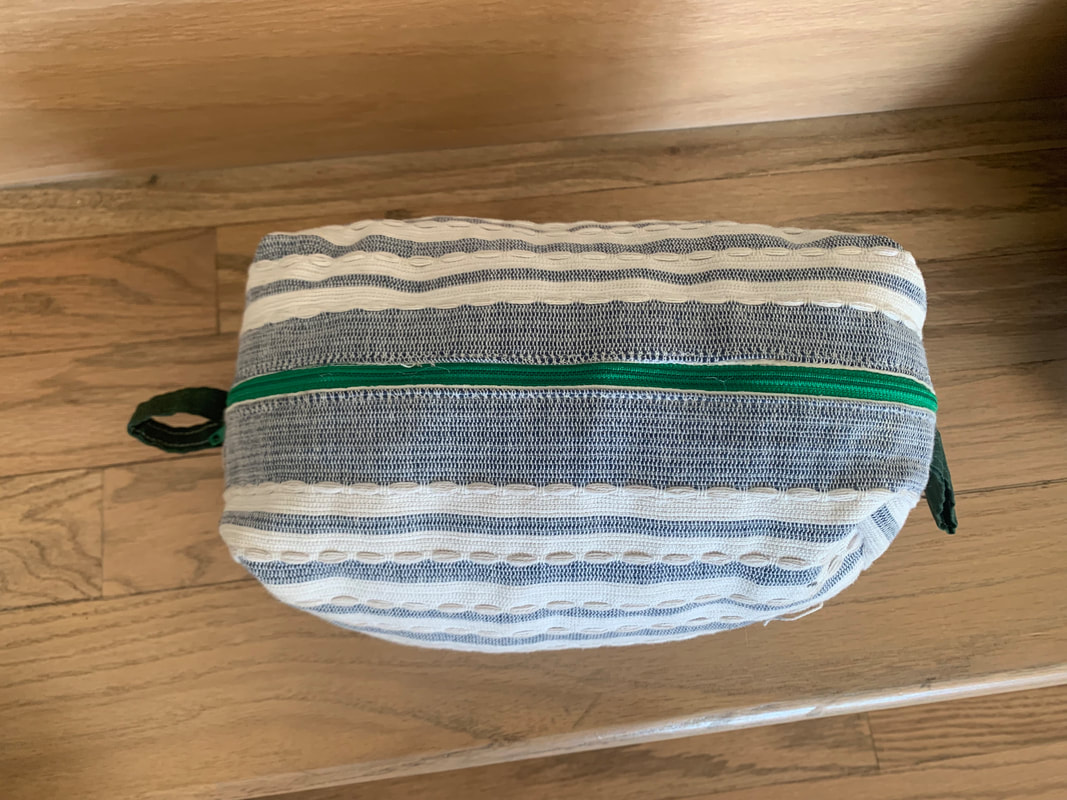
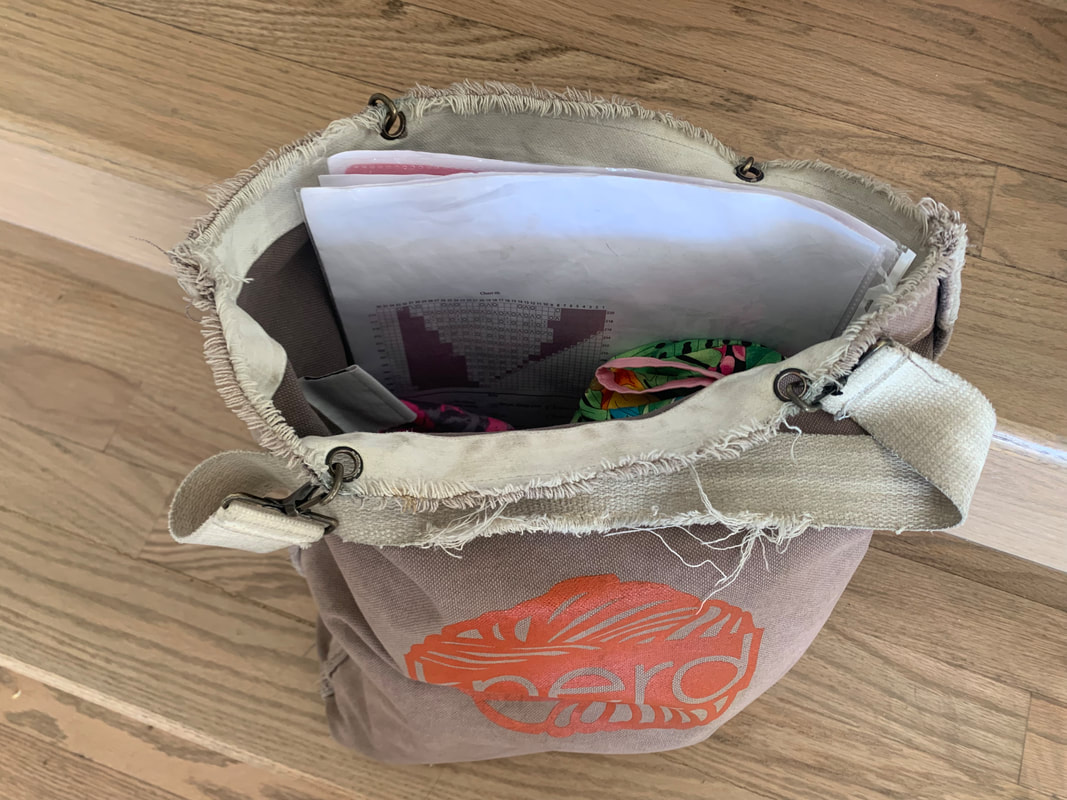
 My lace shawl project in a bag
 3. Bag and Tag
Bags, bags, bags
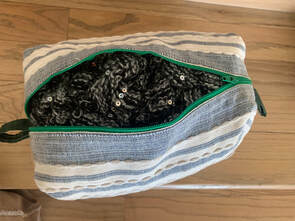
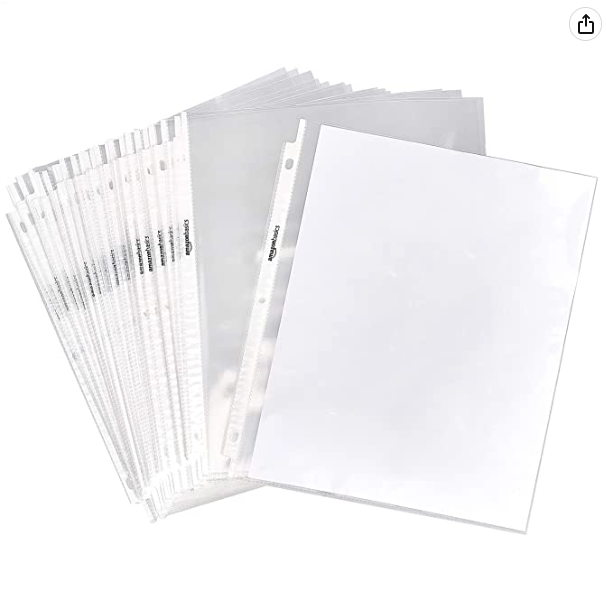
If you know me, you know that I am a self-proclaimed bag lady. I love bags! And there are so many cute ones. Or maybe you also sew, so you can make some of your own (my mother-in-law sews and has made me several!). I love the small, project sized bags that zip closed, because I can store my whole project (and a backup ball of yarn) in there. It also makes it super portable. But this way my projects stay separate. Bigger bags are ok too, especially for larger projects like blankets or sweaters once they grow, though often they don't secure or zip closed at the top. Generally I prefer to use these bags to hold all my smaller project bags, and perhaps a stack of patterns (which I keep in those clear slippery page protectors!) or pattern books I'm using.
What kind of kills me is when someone uses a plastic ziplock bag for their knitting. Now I know, they have a few benefits. For one, they are clear, so you can see what is inside. For two, they do technically seal shut, though not always in the easiest way (i.e. I prefer a sturdy zipper). Something about the plastic is just a turnoff to me. Plus, knitting needles are pointy, and can potentially penetrate the bag - which could mean they could run away or poke holes in your bag, and if you are storing other parts (markers, counters, etc) then you might lose those things as well - disaster! So while I won't shame you for using a plastic ziplock to store your knitting (it is better than nothing!) I would encourage you to indulge a little in a cloth (or recycled plastic with a fun pattern?) bag to store your work.
Tagging or Labels
Once you have bagged your knitting, you might also want to give it a little tag, or label, so that you know what lives in that bag. Now I will admit, this is a step I don't actually do. But if you are the type of knitter who sets aside your work for long periods of time before you come back to it (or perhaps you have a project you need to hibernate for awhile), this might be useful. You could even be super fancy and attach a luggage tag to your little bag, and put in a little tag that says what the project is. You could also list more details, like which pattern you are following, when you started it etc, but I think that information is better input into your Ravelry project page for tracking. Your label could just be the name of the project in Ravelry, and then you can refer to the details there. (More about Ravelry in another future post!)
4. Yarn, Balls, and Unraveling
I could probably go on at length here for more techniques regarding yarn storage, but I'll save it for a future article. Meanwhile, it is good to know that your ball of yarn might make a little mess of itself while it lingers in storage. If you have made some progress on your knitting during its session, your once tightly rolled ball might have become a bit floppy. This is why I advise that before you put it away, you may consider re-rolling it into a center pull ball first. Those loose, floppy piles of yarn when left to their own devices, have a tendency to form into knots, which I promise you won't want to untangle when you pick this project up to knit again. From my experience, I am still the only person alive who actually enjoys untangling and unknotting these messes (I do it a lot for my students), and that is perfectly ok that no one else takes pleasure in this task. Honestly, I could charge extra for this kind of help, but I just enjoy it. Assuming you do not - consider that how you store your yarn will dictate its shape later on. So I'll repeat one last time - your yarn will loosen up in storage. It also will help reduce the space you need to store your project if your balls are neatly rolled.
Bags, bags, bags
If you know me, you know that I am a self-proclaimed bag lady. I love bags! And there are so many cute ones. Or maybe you also sew, so you can make some of your own (my mother-in-law sews and has made me several!). I love the small, project sized bags that zip closed, because I can store my whole project (and a backup ball of yarn) in there. It also makes it super portable. But this way my projects stay separate. Bigger bags are ok too, especially for larger projects like blankets or sweaters once they grow, though often they don't secure or zip closed at the top. Generally I prefer to use these bags to hold all my smaller project bags, and perhaps a stack of patterns (which I keep in those clear slippery page protectors!) or pattern books I'm using.
What kind of kills me is when someone uses a plastic ziplock bag for their knitting. Now I know, they have a few benefits. For one, they are clear, so you can see what is inside. For two, they do technically seal shut, though not always in the easiest way (i.e. I prefer a sturdy zipper). Something about the plastic is just a turnoff to me. Plus, knitting needles are pointy, and can potentially penetrate the bag - which could mean they could run away or poke holes in your bag, and if you are storing other parts (markers, counters, etc) then you might lose those things as well - disaster! So while I won't shame you for using a plastic ziplock to store your knitting (it is better than nothing!) I would encourage you to indulge a little in a cloth (or recycled plastic with a fun pattern?) bag to store your work.
Tagging or Labels
Once you have bagged your knitting, you might also want to give it a little tag, or label, so that you know what lives in that bag. Now I will admit, this is a step I don't actually do. But if you are the type of knitter who sets aside your work for long periods of time before you come back to it (or perhaps you have a project you need to hibernate for awhile), this might be useful. You could even be super fancy and attach a luggage tag to your little bag, and put in a little tag that says what the project is. You could also list more details, like which pattern you are following, when you started it etc, but I think that information is better input into your Ravelry project page for tracking. Your label could just be the name of the project in Ravelry, and then you can refer to the details there. (More about Ravelry in another future post!)
4. Yarn, Balls, and Unraveling
I could probably go on at length here for more techniques regarding yarn storage, but I'll save it for a future article. Meanwhile, it is good to know that your ball of yarn might make a little mess of itself while it lingers in storage. If you have made some progress on your knitting during its session, your once tightly rolled ball might have become a bit floppy. This is why I advise that before you put it away, you may consider re-rolling it into a center pull ball first. Those loose, floppy piles of yarn when left to their own devices, have a tendency to form into knots, which I promise you won't want to untangle when you pick this project up to knit again. From my experience, I am still the only person alive who actually enjoys untangling and unknotting these messes (I do it a lot for my students), and that is perfectly ok that no one else takes pleasure in this task. Honestly, I could charge extra for this kind of help, but I just enjoy it. Assuming you do not - consider that how you store your yarn will dictate its shape later on. So I'll repeat one last time - your yarn will loosen up in storage. It also will help reduce the space you need to store your project if your balls are neatly rolled.
Knitting Storage Recap
Regardless of how you choose to store your knitting, consider that the care you take to put it away will improve the shape it is in when you pull it out again. Protect those stitches from slipping off the needles, protect your project from pets and other environmental issues by putting it in a safe location, prefer lovely bags to store projects in (also great for future transport!) and the neater your store your project, the easier it will be to pick back up later.
4. Pattern Details
Beyond just the knitting itself (yarn and needles), the other important part of storing your project for later work is to KNOW WHERE YOU LEFT OFF in the pattern! This is probably the biggest issue we can run into when picking up a project in the future, especially if that project hasn't seen the light for some time, or if we are working several things at once. Pattern tracking can be accomplished in a number of ways, and everyone has their own techniques. Here are a few of the ways I keep track:
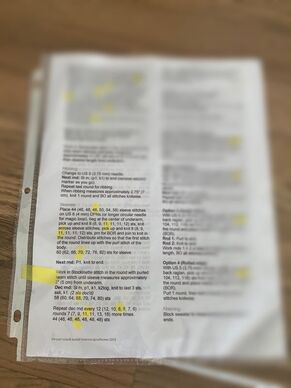 My highlighter tap telling me where I'm at in the pattern.
 a. Highlighter tape, notes on my pattern
Put a piece of highlighter tape at your place in the pattern. You can then also write directly on the tape, draw a line to indicate exactly where you are. This is great for charts, but you can also circle the instruction you were on precisely.
I have become a huge fan of highlighter tape. Better and more sticky than sticky notes, which can fall off your pattern. Now highlighter tape can also lose its stick and fall off, so I like to put it directly on my printed out pattern inside the protective sleeve, which almost completely reduces the chances of that happening. Here, it really depends how long I anticipate the project will sit. If it is more than a couple of weeks, I might also make a note directly on my pattern (maybe in pencil) that this was where I left off.
However you decide to indicate which instruction you were on, you want to choose a way that is consistent for you, and that future you will understand. I absolutely recommend writing yourself a literal note, in addition to the placement of the highlighter tape, that says "I just completed row 15, with one stitch left in my round so the round marker would stay on," or something helpful like that. Leaving too much up to future you interpretation can get us into trouble!
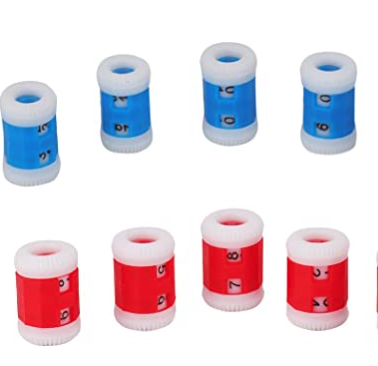
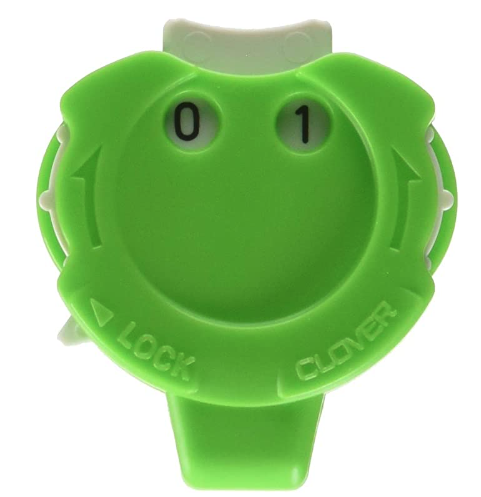
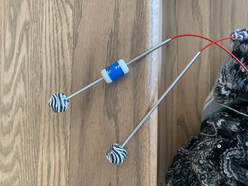 Fun point protectors and my on-needle row counter
 b. Counters, and backup for counters
I love counters! They come in all sorts of varieties and you can even get some row counter apps on your phone or favorite device. I see a lot of folks use tick marks either on their pattern or a sticky-note, but I don't recommend this (hard to know later what they meant). Personally, I love using the physical counters myself. The problem with the counter apps on your phone, (I use "Crochet and Knit Counter" from the app store), is even though you can label the project the count is for, is that when I go to pick a project back up, if the counter isn't attached directly to my project, I might forget that I was storing the count in an app. Instead, I love the little counters that attach directly to your needle. They have some that are for straight needles and my all time fav is the one that doubles as a round marker, since I do a lot of circular projects. I also LOVE the "clicky" counters- where it makes a very distinct "click" sound that is just so gratifying whenever I tick it. There is one drawback to this type though, which is when storing in your project bag, it might accidentally advance itself! (This has happened to me a lot with this counter, which I still use because I love the "click" so much!) So the advice here, the save, is that when you put a project into storage (no matter how short term or long term), make another note on your pattern of what your counter says. I promise it will save you tons of time and heartache. And if the physical sticky note (attached to your pattern and slid inside the page protector) isn't available, another place you can make notes is directly on your Ravelry project. The only trick there is remembering that you stored that information there.
I love counters! They come in all sorts of varieties and you can even get some row counter apps on your phone or favorite device. I see a lot of folks use tick marks either on their pattern or a sticky-note, but I don't recommend this (hard to know later what they meant). Personally, I love using the physical counters myself. The problem with the counter apps on your phone, (I use "Crochet and Knit Counter" from the app store), is even though you can label the project the count is for, is that when I go to pick a project back up, if the counter isn't attached directly to my project, I might forget that I was storing the count in an app. Instead, I love the little counters that attach directly to your needle. They have some that are for straight needles and my all time fav is the one that doubles as a round marker, since I do a lot of circular projects. I also LOVE the "clicky" counters- where it makes a very distinct "click" sound that is just so gratifying whenever I tick it. There is one drawback to this type though, which is when storing in your project bag, it might accidentally advance itself! (This has happened to me a lot with this counter, which I still use because I love the "click" so much!) So the advice here, the save, is that when you put a project into storage (no matter how short term or long term), make another note on your pattern of what your counter says. I promise it will save you tons of time and heartache. And if the physical sticky note (attached to your pattern and slid inside the page protector) isn't available, another place you can make notes is directly on your Ravelry project. The only trick there is remembering that you stored that information there.
Pattern Storage Recap
Regardless of which approaches you choose to keep track of where you are in your pattern (physical paper, digital, etc), the key is that you develop a system that works for you, and that you will remember. There is no shame in writing yourself little notes and leaving it with your knitting project. Maybe pin the note to the inside of your knitting bag: "I wrote the counter value in my Ravelry project" or "The count I left off on was 25." I love reminders, and we all need them. Our brains can only hold so much at one time!
Storing Project Recap
I hope that you find these storage techniques make a difference and increase the quality of your knitting time! If you do find yourself in a pickle, please feel free to reach out to me via my Knitting Help Form, or by joining Knit Chats and reaching out to me directly on slack! Please also subscribe to my newsletter, and follow me on the socials!


 RSS Feed