Astraknots
  • How to Fix Knitting Mistakes
    • Get Knitting Help
  • Help Reading Knitting Patterns
    • Learn How to Read Knitting Patterns
    • Knitting Pattern Assumptions
    • Read Knitting Charts
  • Download Free Knitting Patterns
  • Take Knitting Lessons
    • Read That Pattern Knitting Class by Astraknots
    • Knitting Lessons Denver Co
    • Learn New Knitting Skills
  • Knitting Tips and Tricks
    • Beginning Knitting
    • Cast On Methods
    • Knit Purl English Continental
    • Garter Stitch Stockinette St
    • Identifying Knit Vs Purl Sts
    • Cast On Bind Off
    • K2tog Decrease Kfb Increase
    • Colorwork - Stepless Color Change in the Round
    • Tools - Slipping stitches to holders, barber cord
    • Short Rows - Wrap & Turn
  • Astraknots Shop
    • Astraknots Shop Hats

How to Knit Faster

4/8/2023

1 Comment

 
  Knitting is a craft that takes time. But if you are passionate about it, you likely have more projects in mind that you would like to knit than you feel you have a lifetime for! (That's how I feel, anyway!). And so you may have a desire or curiosity to know how to knit faster so you can complete more projects! This post was actually inspired by a question someone asked in our KnitChats help-line, and I realized I have a few thoughts here to share!
  Many people have commented to me when they see me knitting that I am so patient. But I don't feel patient at all! I think I am knitting to help pass the time because I don't want to just sit still! Now I will share how I think about the speed that you can knit and some ideas of how to get faster!

English vs Continental .... and then Portuguese!
  If you are newer to knitting, then there is still some learning of the mechanics of how to knit going on. It takes time to build the muscle memory of how to execute knitting stitches. There are two usual techniques of how someone knits: English style (also called "throw" or "American"), where you wrap the yarn with your right-hand, and Continental style, where you wrap the yarn with your left-hand. I know there are folks who say there is a handedness to knitting, but I consider that you use both hands, so I'm not totally sure if there is. I do believe that continental style knitting is faster, because when you "throw" with your right hand, you remove your hand from the needle to wrap the yarn. This is because the working yarn is attached to the right-hand needle. (I think this is why knitting by default is technically "right-handed," because this is the direction that we knit). When you wrap with your left-hand (or really a left-finger), it is faster because you don't have to take your hand off the needle. There are actually other techniques to wrap yarn, one of them being Portuguese knitting, where the yarn is threaded through a pin attached to your shirt, and you don't use your fingers to wrap at all! This method might be even faster than both English and Continental, but once again you must master the mechanics for any of these techniques to work for you.

Needles 
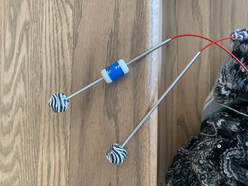
  The next thought that comes to mind when thinking about how quickly I can knit is which needles you are using. While bamboo or driftwood needles, as well as plastic, are more "sticky," metal needles can help to speed up the process. "Addi turbos" are a smooth metal that are named that because of this. The pointy-ness of the needles will also make a difference. I noticed this recently when I was working up a couple of swatches using different needles. Some of my older bamboo needles have less pointy tips, which can make it more difficult to put the needle into the next stitch to knit. So something to consider would be how pointy your needles and how smooth and slippery they are! If the stitches slide easily (such as on metal) then they will be faster to queue up to cruise through! The danger to watch out for here is that if stitches slip more easily, they are more likely to slip off the ends of the needles when you are knitting, so be careful for that!
  The size of needles can also make a difference, and whether they are straight, circular, or double pointed needles! It all depends on how easy they are to hold. Projects requiring larger or very small needles tend to be slower for me. Big needles make my hands tired faster. And small needles mean thinner yarn and sometimes needing to see it that small can make me knit slower. You can't always make an adjustment here, depending on your project. Some circular needles, such as 9" ones, don't have as much of a needle to hold onto, so that can make it feel slower to knit. Although, this may still be faster than working with a small round of double pointed needles, where you have to be continuously shifting the needles as you work a round! 
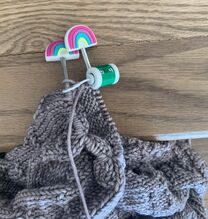
Yarn
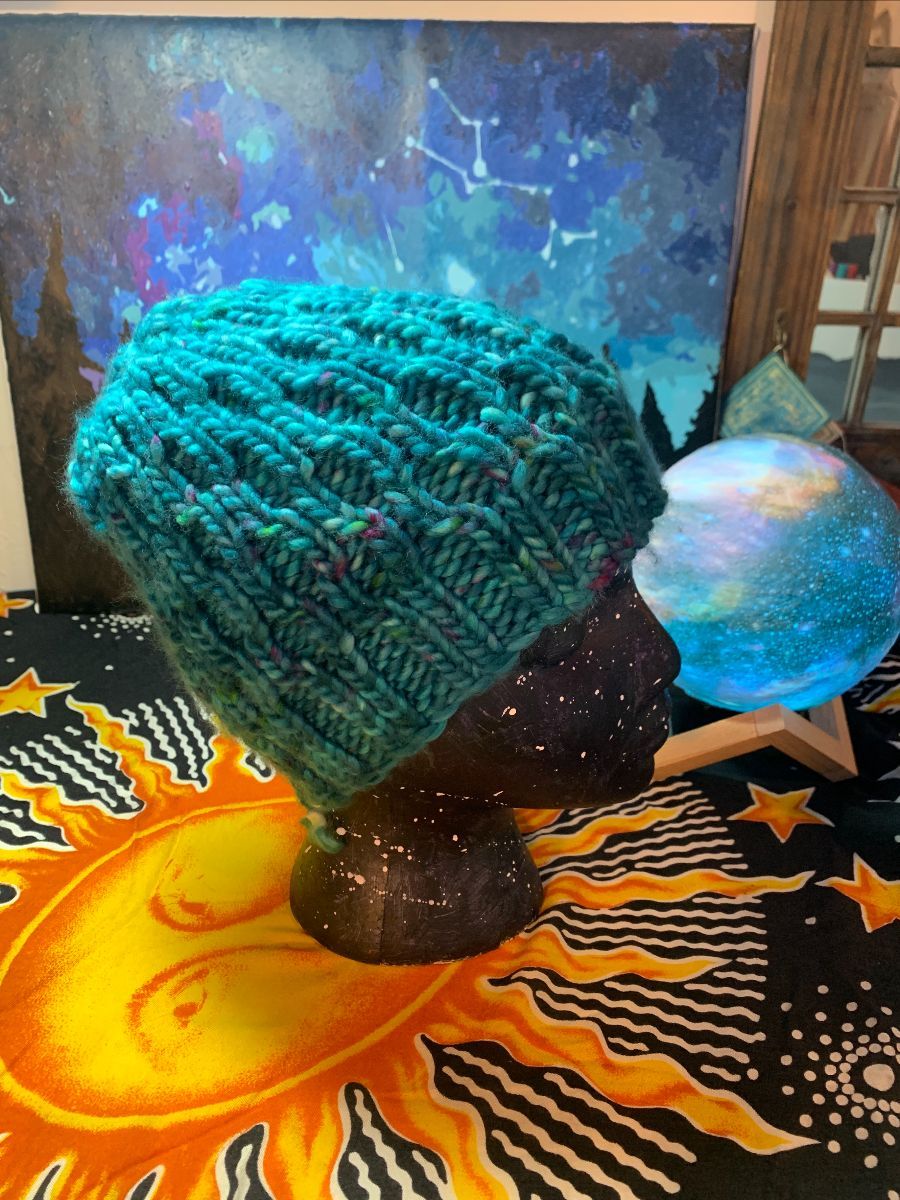
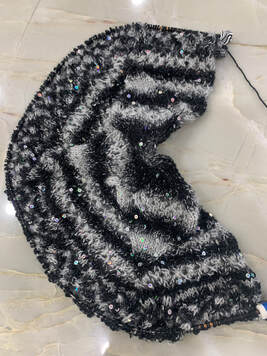
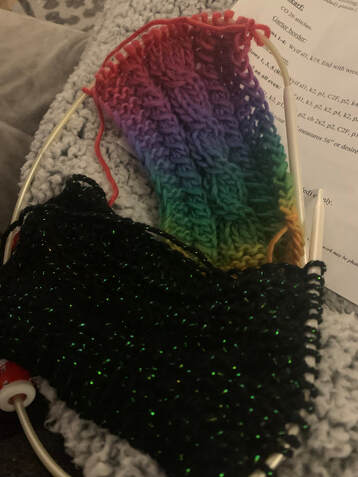
  Some yarns are more "splitty" than others. And fuzzy yarns (such as mohair, or ribbon yarns) make it harder to see the separation between stitches. Using a smooth and medium weight yarn will always be faster than a really thin or fuzzy yarn. 

Patterns
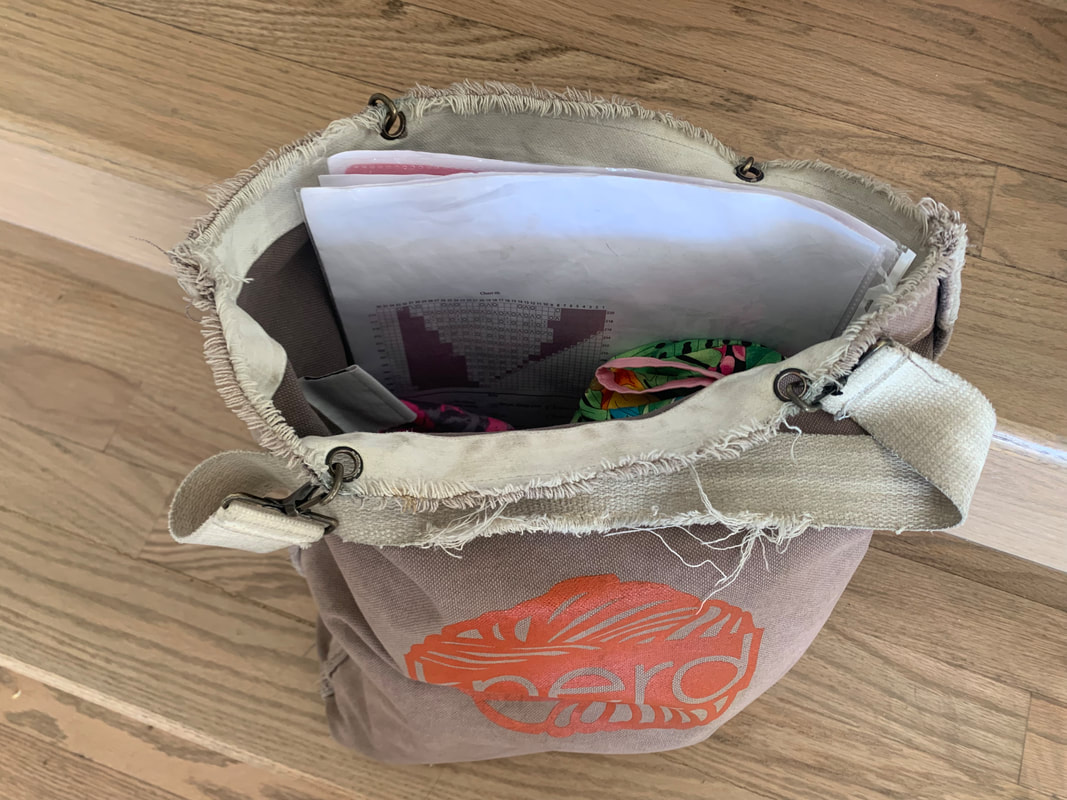
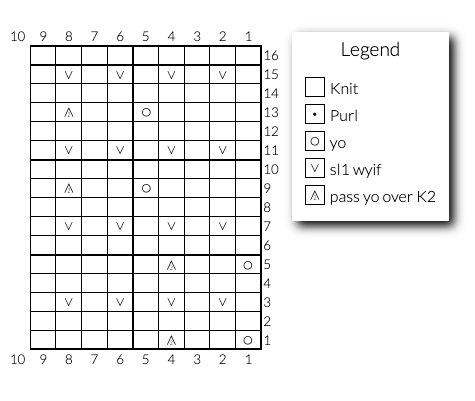
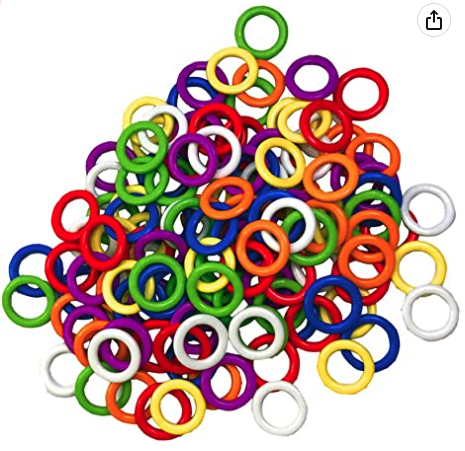
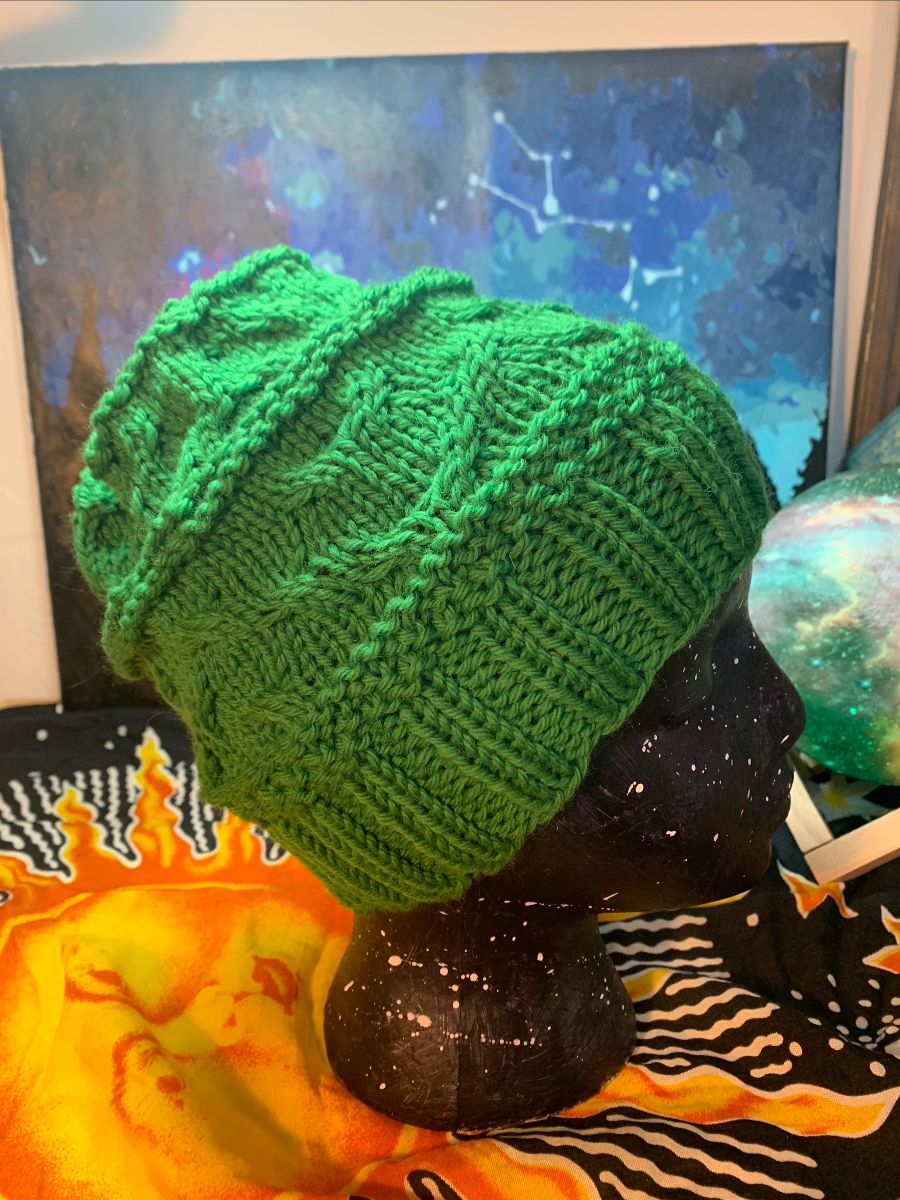
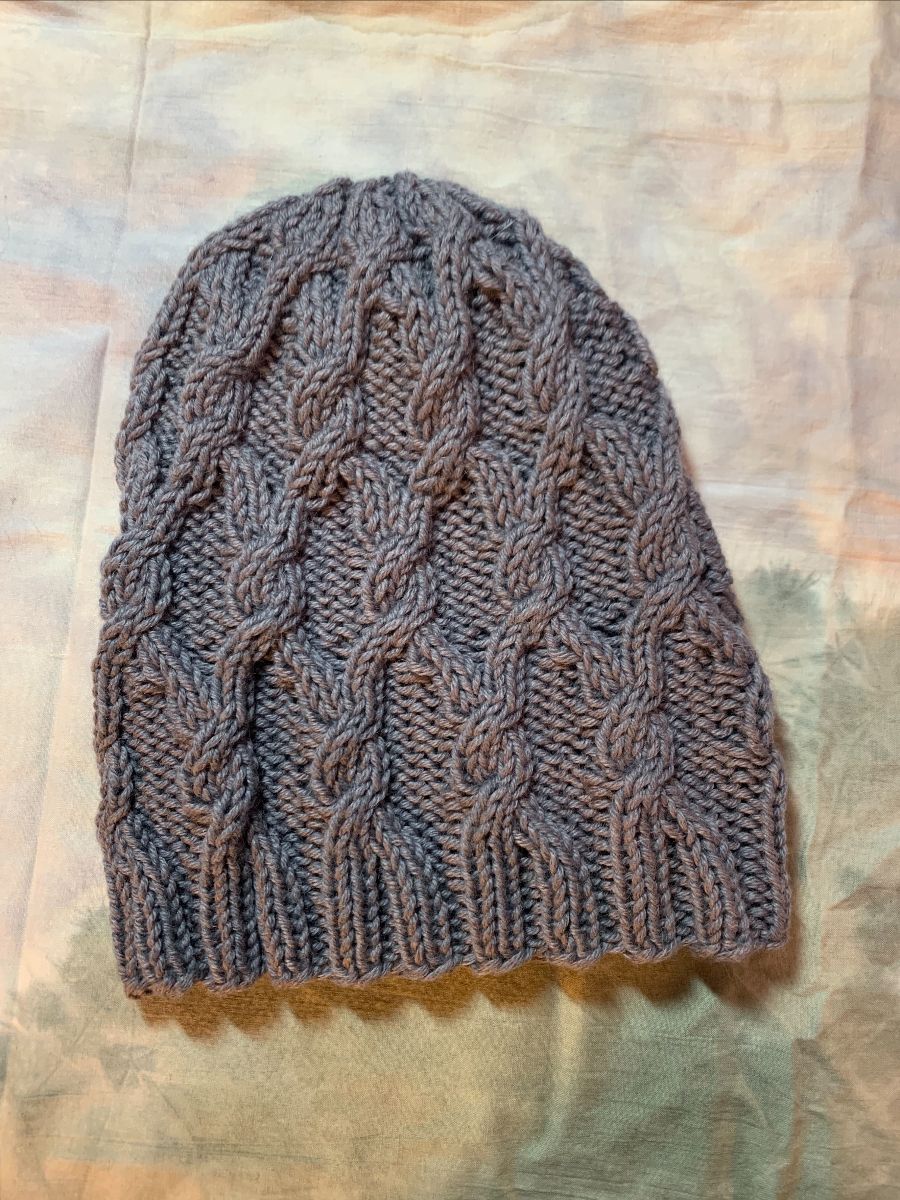
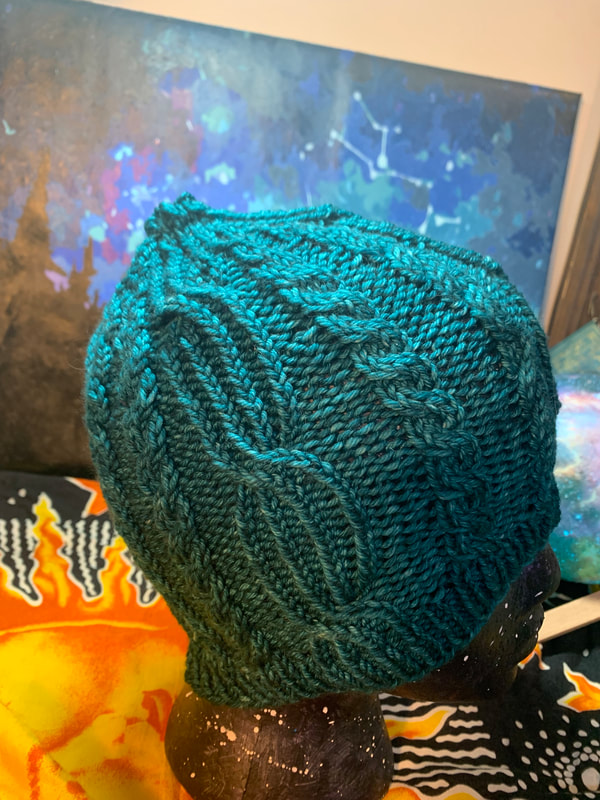
  The stitch pattern you are working will also make a difference in your speed. Doing something more complex like cables or lace will definitely be slower than straight stockinette stitch! But one tip I would offer is that if you are doing a pattern that has repeats, to place a stitch marker between each repeat. This will make it faster for you to keep track of where you are, and help with the memorization that sometimes occurs when we knit a repeating pattern a lot of times. If you are working a pattern that requires a lot of counting, using stitch markers to break that up so you don't have to count back to the beginning also helps. This should also help you to avoid mistakes or catch them sooner. 
  Depending on how much of your brain space you are using to interpret the pattern will also affect your knitting speed. How familiar are you with the stitches you are doing? Do you have to keep referring to a key in a chart? When I was earlier in my knitting career I spent a lot more time writing out what knitting patterns were saying in a condensed way. This helped me to knit faster because I wasn't doing as much interpretation while I was knitting. (But be warned! There is a lot of room for error when you write things out.) Sometimes it can be helpful to enumerate instructions so you don't have to keep translating what the pattern is telling you to do. 

  Hopefully you found some helpful tips in here that will help you to get faster with your knitting so you can get more projects done! Please leave me a comment if you found this useful or if you have another suggestion to speed up your knitting!


1 Comment

How to Store Your Knitting Project (and Pick it Back Up Later)

1/19/2023

0 Comments

 
Picture
Most knitting projects take more than one sitting to complete. And if we don't store our project in progress properly, it can succumb to many problems that will make it more difficult for us to pick it back up again later. In this article, I will share my tricks to keep my projects sane and easy to pick back up again. This is also effective for when you are like me, and have to have several projects going at the same time. (In a future article, I'm also going to talk about how to optimize your knitting project for travel.) These tips go in order, starting with the quickest/simplest and advancing from there depending on your level of compulsion. Feel free to comment if there is something you do that I left out!

 1. Protect it from Pets 
Many of us fiber fans are also fans of furry friends or have big furry families. Sometimes our furry friends also find interest in our fiber, and unfortunately that can lead to disastrous results if we are not careful. (Ex: old story of a pet disaster from Ravelry; warning: a little gross). One thing I remind all of my knitting students is to properly store our knitting to protect it from furry friend curiosities. This can really be as simple as putting it away in a safe location, where our pets can't access it. Whether you have cats, dogs, ferrets or other pets who freely roam your household, it might be a good idea to not just leave the project sitting on the couch. 

PictureI adore these rainbow point protectors!
​2. Keep the stitches on the needles
A common issue that I see beginners have, is they have yet to grok the importance of keeping the stitches on the needles. This can lead to mistakes in the process of knitting (i.e. dropped sts, etc), but it can also happen when the project isn't being actively worked on. I don't know if it is the gnomes or what, but if you don't secure your sts on your needles when storing a project, they are at risk of falling off the needles. This is not a fun way to pick a project back up again - having to do restoration. Fortunately, there are some beautiful tools that help out in this purpose (and you know I love my tools!). Point protectors - simply secure these rubber devices on the points of your needles, and go forward with confidence that your yarn won't slip off. I have seen knitters (and ok, personally done this myself as well) where instead I just shove the points of the needles into my ball of yarn when storing. As long as you push the stitches towards the blunt end of straight needles, or move the stitches towards the center of your circular needle, and pull the points out further, this can be an ok method. But it would only be a backup to utilizing point protectors. And now they come in all sorts of fun and cute styles - so why wouldn't we use them?

PictureMy lace shawl project in a bag
3. Bag and Tag
Bags, bags, bags

If you know me, you know that I am a self-proclaimed bag lady. I love bags! And there are so many cute ones. Or maybe you also sew, so you can make some of your own (my mother-in-law sews and has made me several!). I love the small, project sized bags that zip closed, because I can store my whole project (and a backup ball of yarn) in there. It also makes it super portable. But this way my projects stay separate. Bigger bags are ok too, especially for larger projects like blankets or sweaters once they grow, though often they don't secure or zip closed at the top. Generally I prefer to use these bags to hold all my smaller project bags, and perhaps a stack of patterns (which I keep in those clear slippery page protectors!) or pattern books I'm using.
What kind of kills me is when someone uses a plastic ziplock bag for their knitting. Now I know, they have a few benefits. For one, they are clear, so you can see what is inside. For two, they do technically seal shut, though not always in the easiest way (i.e. I prefer a sturdy zipper). Something about the plastic is just a turnoff to me. Plus, knitting needles are pointy, and can potentially penetrate the bag - which could mean they could run away or poke holes in your bag, and if you are storing other parts (markers, counters, etc) then you might lose those things as well - disaster! So while I won't shame you for using a plastic ziplock to store your knitting (it is better than nothing!) I would encourage you to indulge a little in a cloth (or recycled plastic with a fun pattern?) bag to store your work. 

Tagging or Labels
Once you have bagged your knitting, you might also want to give it a little tag, or label, so that you know what lives in that bag. Now I will admit, this is a step I don't actually do. But if you are the type of knitter who sets aside your work for long periods of time before you come back to it (or perhaps you have a project you need to hibernate for awhile), this might be useful. You could even be super fancy and attach a luggage tag to your little bag, and put in a little tag that says what the project is. You could also list more details, like which pattern you are following, when you started it etc, but I think that information is better input into your Ravelry project page for tracking. Your label could just be the name of the project in Ravelry, and then you can refer to the details there. (More about Ravelry in another future post!)

4. Yarn, Balls, and Unraveling
I could probably go on at length here for more techniques regarding yarn storage, but I'll save it for a future article. Meanwhile, it is good to know that your ball of yarn might make a little mess of itself while it lingers in storage. If you have made some progress on your knitting during its session, your once tightly rolled ball might have become a bit floppy. This is why I advise that before you put it away, you may consider re-rolling it into a center pull ball first. Those loose, floppy piles of yarn when left to their own devices, have a tendency to form into knots, which I promise you won't want to untangle when you pick this project up to knit again. From my experience, I am still the only person alive who actually enjoys untangling and unknotting these messes (I do it a lot for my students), and that is perfectly ok that no one else takes pleasure in this task. Honestly, I could charge extra for this kind of help, but I just enjoy it. Assuming you do not - consider that how you store your yarn will dictate its shape later on. So I'll repeat one last time - your yarn will loosen up in storage. It also will help reduce the space you need to store your project if your balls are neatly rolled. 

Knitting Storage Recap
Regardless of how you choose to store your knitting, consider that the care you take to put it away will improve the shape it is in when you pull it out again. Protect those stitches from slipping off the needles, protect your project from pets and other environmental issues by putting it in a safe location, prefer lovely bags to store projects in (also great for future transport!) and the neater your store your project, the easier it will be to pick back up later. 

4. Pattern Details
Beyond just the knitting itself (yarn and needles), the other important part of storing your project for later work is to KNOW WHERE YOU LEFT OFF in the pattern! This is probably the biggest issue we can run into when picking up a project in the future, especially if that project hasn't seen the light for some time, or if we are working several things at once. Pattern tracking can be accomplished in a number of ways, and everyone has their own techniques. Here are a few of the ways I keep track:
PictureMy highlighter tap telling me where I'm at in the pattern.
a. Highlighter tape, notes on my pattern
Put a piece of highlighter tape at your place in the pattern
. You can then also write directly on the tape, draw a line to indicate exactly where you are. This is great for charts, but you can also circle the instruction you were on precisely. 
I have become a huge fan of highlighter tape. Better and more sticky than sticky notes, which can fall off your pattern. Now highlighter tape can also lose its stick and fall off, so I like to put it directly on my printed out pattern inside the protective sleeve, which almost completely reduces the chances of that happening. Here, it really depends how long I anticipate the project will sit. If it is more than a couple of weeks, I might also make a note directly on my pattern (maybe in pencil) that this was where I left off. 
However you decide to indicate which instruction you were on, you want to choose a way that is consistent for you, and that future you will understand. I absolutely recommend writing yourself a literal note, in addition to the placement of the highlighter tape, that says "I just completed row 15, with one stitch left in my round so the round marker would stay on," or something helpful like that. Leaving too much up to future you interpretation can get us into trouble!
​

PictureFun point protectors and my on-needle row counter
b. Counters, and backup for counters
I love counters! They come in all sorts of varieties and you can even get some row counter apps on your phone or favorite device. I see a lot of folks use tick marks either on their pattern or a sticky-note, but I don't recommend this (hard to know later what they meant). Personally, I love using the physical counters myself. The problem with the counter apps on your phone, (I use "Crochet and Knit Counter" from the app store), is even though you can label the project the count is for, is that when I go to pick a project back up, if the counter isn't attached directly to my project, I might forget that I was storing the count in an app. Instead, I love the little counters that attach directly to your needle. They have some that are for straight needles and my all time fav is the one that doubles as a round marker, since I do a lot of circular projects. I also LOVE the "clicky" counters- where it makes a very distinct "click" sound that is just so gratifying whenever I tick it. There is one drawback to this type though, which is when storing in your project bag, it might accidentally advance itself!  (This has happened to me a lot with this counter, which I still use because I love the "click" so much!) So the advice here, the save, is that when you put a project into storage (no matter how short term or long term), make another note on your pattern of what your counter says. I promise it will save you tons of time and heartache. And if the physical sticky note (attached to your pattern and slid inside the page protector) isn't available, another place you can make notes is directly on your Ravelry project. The only trick there is remembering that you stored that information there. 

Pattern Storage Recap
Regardless of which approaches you choose to keep track of where you are in your pattern (physical paper, digital, etc), the key is that you develop a system that works for you, and that you will remember. There is no shame in writing yourself little notes and leaving it with your knitting project. Maybe pin the note to the inside of your knitting bag: "I wrote the counter value in my Ravelry project" or "The count I left off on was 25." I love reminders, and we all need them. Our brains can only hold so much at one time! 

Storing Project Recap
I hope that you find these storage techniques make a difference and increase the quality of your knitting time! If you do find yourself in a pickle, please feel free to reach out to me via my Knitting Help Form, or by joining Knit Chats and reaching out to me directly on slack! Please also subscribe to my newsletter, and follow me on the socials!
0 Comments

Counting Stitches: A Pattern-Math Adventure

1/12/2023

0 Comments

 
One of the most common mistakes that I find in patterns is when the instructions don't "math" up to the right number of stitches. When things don't work out properly, it can be our first instinct to think we've done something wrong. But that isn't always the case. Thus, I have become rather adept at counting how many stitches I'm supposed to have in a pattern in order to look for mistakes. In this blog, I'll attempt to share some of my tricks with you, in case you want to do the same!

The basics are pretty straightforward: K3 counts three stitches. It's the shaping stitches: increases and decreases, and then more complex magic like cables and lace that can get wonky. I would nominate lace as the most complex counting task, even beyond general shaping, just because the number of stitches is constantly changing within a row, and it can make it difficult to use markers to help you. (See this article where I talk about how to use markers to help you have to count less!)

There are generally two counts of a row you can have - the count before you work it and the count after. If you are lucky enough to follow a generously written pattern, they will often tell you the stitch count you are supposed to have once you've completed some shaping instruction that changes the total stitch count. 

Here are some guidelines of how to count particular stitches before AND after you knit them. The "Before count" means how many stitches you should have in your row before you've worked that instruction. The "After count" is how many sts you would count after working that stitch. For example, if my row instruction read: K3, K2tog, K6, ssk, K1. The "before count" would be: 3+2+6+2+1=14 sts. The "after count" would be 3+1+6+1+1=12 sts. 
Stitch Before count After count
k2tog 2 1
p2tog 2 1
ssk 2 1
psso (or skp) 2 1
m1 (M1R, M1L) 0 1
yo 0 1
any double decrease 3 1

Counting in Lace patterns

Lace patterns, as I mentioned are especially tricky because the number of sts is often changing every lace row. Usually there is a combination of increases (yo) and decreases (k2tog, ssk) within a single row. Sometimes this means that the overall number of sts does NOT change before and after the row, but within each repeat of the pattern (since the lace pattern is also, often, repeating). For example, your lace row might be: K3, *K2, K2tog, yo, K4*, to last 3 sts, K3. So while the k2tog would decrease the st count by 1, and the yo would increase it by 1, that would be a net 0 change. 
The way that this is meaningful or helpful though, is when you are working your lace pattern, and something gets off. You may have missed a yo (the usual thing I miss) and it has offset the whole pattern. (See this blog entry for the story of when I had a lot of this type of pain). While it may require tinking to resolve, hopefully this method of counting can help you to find out more quickly when you have a counting error. 

Counting in Charts

Picture
Counting stitches is another thing I do when following a chart. (Also, when I'm designing patterns with charts). Unfortunately it is not always the easiest thing to read. It is difficult to represent the changing counts of patterns in a chart, which can make the chart more difficult to read as well. This is where knowing how many stitches before and after an increase or decrease stitch can help. In the chart pictured here, the yo increases one stitch and the pass yo over K2 decreases by 1. The rest of the stitches don't change the overall stitch count. 

0 Comments

To knit or not to knit (a pattern), that is the question

1/6/2023

0 Comments

 
PictureThe Ravelry link to yarn ideas in my stash that shows up on patterns!
Happy New Year! I hope you had a safe and relaxing holiday. Maybe you even spent some time organizing your stash, or perhaps you received some new yarn to put towards some new projects! I recently did both things, updating my stash in Ravelry and also queuing up several new projects to cast on in the new year. 
One feature I love on Ravelry, if you have your stash logged, is when viewing a pattern, there is a link to yarn suggestions and it will show you what you have in your stash that might be suitable for knitting a particular pattern! Genius!

While picking the yarn is a task in itself, choosing which pattern to knit can also be a task. I love this stash feature to help me hone in on how I can stash bust, but if I am going to invest the time knitting, I want to pick the right pattern. 

I also help a lot of folks out with their knitting patterns - you can get help from me too! Submit a help request or join us over on Knit Chats for round-the-clock knitting and crochet help!

Read the whole pattern first. Just like cooking from recipes, I advise my knitting students to read through the entire pattern before casting on or working up a gauge. While it can be tricky to determine if a "pay" for pattern will be worth it ahead of time, there are several clues that can point you in the right direction. Learn about essential pattern elements. Read more about the elements I consider essential to good knitting patterns here. Most patterns contain mistakes. Ultimately, it is best to assume that all patterns contain mistakes, or that you will make a mistake or get confused at some point. It's important to know that THIS IS NORMAL!

Reading knitting patterns is like reading in another language. Not everyone finds it as fun as I do! 
Stretch yourself, but not too much. So if that is the case, take the time to acquaint yourself with the essential pattern elements to look for. Maybe start by reading the list of abbreviations or special instructions translated in a pattern. My general rule of thumb for beyond beginner or knitters looking to gain more skills, is to only choose a pattern that contains 1-2 new stitches for you. Go beyond that and it might get overwhelming. Just like with recipes, where you make sure you have or can make all the ingredients!

Look up errata before you start. It's also a good practice to make sure that the pattern exists on Ravelry. This makes it easier to find any posted errata (known mistakes from the author and fixes). You can also search pattern websites but if the patterns are out of books or very old, you may be in for more of an adventure. Use caution! 

For the love of photos. One thing that is a clue you might be looking at a decent pattern is if it contains lots of photos. Depending on what you plan to knit from the pattern, the more complex, the more photos you will want. This can be especially helpful to debug (sorry, coder term!) any strangeness that comes up, or hard to interpret instructions. 


Picture
When I click that '5 ideas' link, the page that it shows
0 Comments

Tools to Keep you on Track in your Pattern

1/5/2023

1 Comment

 
Picture
Beyond working with needles and yarn, a challenge of being a knitter is learning to interpret and follow knitting patterns. Written in a condensed "knit-speak" of abbreviations and other knit-isms that are usually only learned from experience, patterns may contain the keys to creating beautiful works of art, but only if you can learn the sometimes secret language they contain.
Hand knitting creations of love also takes time, usually multiple sessions, so learning to follow patterns and keep track of where you are (or where you left off) is an additional task to track. This can be especially difficult for beginners, who are already trying to learn the muscle memory of just handling the yarn and needles. 
In my beginning knitting days, I used to write out condensed instructions in patterns in expanded form. While it was good practice to determine what the pattern was trying to say, it also introduced a lot of room for error in those translations. In some cases, however, I still find it helpful to write out some instructions. 
When helping knitters on their projects, I see many methods of tracking patterns. Usually lots of little check marks or scribbles on the page. 
In this post, I want to share a few ways that I keep track of where I am in patterns, with the hope you try some and it eases your knitting experience. You will notice an emphasis on "using the tools," which is something I love about knitting - that there are tools - and how it helps take our mind off everything except the knitting itself. 

1. Printed Pattern - Tools: Sheet Protectors. I am actually quite a technical person, being in software development, and while there are several very fun apps out there that help you track your pattern, nothing feels quite like paper in your hand. I also like to have the pattern printed in case my device with the app dies, or I forget that that is where the pattern is. It's also easier to write notes directly on patterns, and I don't always trust the applications to save everything. Long ago I bought a huge pack of those see-through slip sleeves, so I put each pattern into that to keep the pages together (works better than a staple) and also protects the paper from getting quite as crumpled. 

​2. Multiple sizes - highlight your size. If the pattern you are working from has multiple sizes, before you start working it, I recommend highlighting the instructions that correspond to the size you'll be working throughout the pattern. Then you won't have to remember or think about having to follow the instruction listed second in the parentheses, etc every time you encounter it. This is another benefit to having the pattern printed out. I will also use highlighter tape to do this, if I don't have an actual highlighter handy. 

3. Tools: Row counters. I love me some clickers! The row counters that make a very satisfying "click" noise whenever you track a row. But I also love the row counter wheels that hang directly off your needles. I've found them in both the kind that fit onto a needle, and the kind that *double* as a round marker! My advice for how to set your row/round counter, is to have it say the number of the row or round you are ON. If you are about to start a row, it should say the number of that row. i.e. if you have just cast on your work and joined in the round, your row counter will read "01." That way, if I stop knitting in the middle of my row, I will always know which row I am on! I highly recommend using row counters over just check marks on a sticky note (a technique I see a lot of beginners use) because the number is easier to read off a counter vs having to count up checks! Also, it tells you more about where you are in the pattern. See also: Highlighter tape. 

4. Tools: Stitch markers. I love using stitch markers! It helps keep the counting down. I like to put them between repeats of patterns within rows. I'll use the ones that look like little safety pins to mark which side of my work is the "right side." Stitch markers come in all sorts of fun styles and colors, and some are better than others depending on your project. While the fun ones with lots of dangling bits are cute, they often get stuck in my yarn so I usually use the solid round ones the most. The way these help me keep track of where I am in my pattern is especially in repeats of patterns. If I have a marker at the beginning of each repeat, I can look back and read my knitting just from that repeat, rather than having to go all the way to the beginning of the row. 

5. Tools: Highlighter tape. Another great use of highlighter tape is when following charts. In a chart I may use it to underline the row that I am working. One caution about the tape: if you put it directly on the slippery sleeve, it might lose its stick and fall off. So better to put it directly on the pattern and put that into the sleeve before storing! I've learned this the hard way a few times. 
I also use a piece of tape directly on my pattern at the place of my instruction. Sometimes you'll be following an instruction block for awhile, i.e. "Knit until piece measures x inches from cast on edge." Putting the tape there helps me to know which part of the pattern I'm in when I come back to a pattern after setting it down for awhile.  

6. Ravelry notes! Of course I love tracking my projects in Ravelry! There are many reasons to do this (see some of my other posts about patterns), but Ravelry also has a great section for notes on each of your projects. There is even a "private notes" section, in case you don't want your ramblings public to the world. This is a nice way to have everything about your pattern tracked in one place. Because of course I love putting in the details about which yarn, needles, etc I used. 

List of handy tools mentioned here:
  • Sheet protectors. (Those see-through sleeves for paper) - the kind that can later go in a 3-ring binder!
  • Highlighter tape! Comes in lots of fun colors
  • Row counters. So many varieties. So many fun ways to count. 
  • Stitch markers. Lots of styles, many uses. 

1 Comment

2022, Knit me, Purl you

12/26/2022

0 Comments

 
[This is my newsletter, sent 12/22/22]
Happy Holidaze!
Brrrr!!!! Are you staying cozy with your knitting project during this arctic blast we are having here in Colorado!? I hope so! Personally, I have several projects on the needles right now, and I'm super thrilled about it. I recently purchased some more fun yarns on a visit to Arizona, and am very proud of myself for planning out which projects I am going to knit with them. 

It has been a really busy and intense end of the year for me, complete with trials and tribulations. But also a lot of deep reflection and learning. There have been many great reminders to keep up the self-care, and self-love, and knitting is a direct way to this! It helps bring peace and gives me something to look forward to. I hope it has done the same for you!

I had wanted to send out a note sooner, but we do our best, and so here it is!
I have published several new patterns this year, all for hats, and I would like to offer you a coupon code if you decide to purchase one from my Ravelry store. 

The code is KNITNOW22, and it is good for 20% off until the end of 2022! 

Below you can see and link directly to the patterns :) I also have them available on Etsy, but not with a coupon yet. 

Well, we are closing in on the remaining holidays for this year - wish you a very Happy Hanukkah, Merry Christmas, Blessed Solstice, or whatever your holiday of choice is! 

Astrologically, we are approaching a Mercury Retrograde period, and I find this is a great time to work on finishing up projects, but not really starting new ones. It tends to be a time that is good for words starting with "Re" - including Rest, Relaxing, and Reflection. Best to take it slow and get through the pile of Repairs. Or patterns with lots of Repeats!

And if you are already thinking ahead to some Resolutions in the new year, it will be a great time for it. 

Personally, I am working on a lot of things: Releasing lots of hang-ups from the past, Re-learning lessons that didn't quite take the first time, and Readying myself with new goals and a change of pace. 

Some things to look out for from me in the new year:
* New Videos - It's been a long time coming, but I have a long list and plan to be sharing more knitting help videos!!
* New Classes - I plan on offering my Astrology Knitting - Knitting by the Stars again, learning from lessons from my first class and applying them again. I'm also toying with the idea of teaching a Stranded Intarsia technique class, which will support how to knit my CO Flag Mtn Sunset hat (offered below!)
* More Newsletters - Writing is another craft I have been working on and working to get better at. So I plan on writing more newsletters and sharing with you about knitting, astrology, etc. 

I appreciate your continued support by staying a subscriber and follower of Astraknots. There is still much excitement on the horizon. 

Wishing you all the best!
Cheerfully,
Genevieve
0 Comments

Tink Tink Lace

11/14/2022

1 Comment

 
Picture
   There are some knitting projects that are far more appropriate to do when you are not tired, in good lighting, and with focus. Often lace is involved, though complicated cables probably qualify as well. I mention this because of a recent experience working on a lace shawl for my mom. The yarn is black, white, and gray variegated with some sequin sparkles included (wool/acrylic with already threaded sequins in the yarn). It’s single-ply, soft, and fingering weight and going to be a beautiful shawl. I am following a free pattern, which means, well, you get what you pay for.
The pattern consists of only charts and pictures. Since it was written only this year, there aren’t other projects or notes for it on Ravelry. (A strategy I recommend employing is looking up patterns on Ravelry to see if there are any gotchas others have already called out).
Starting with the first chart, I quickly came to a symbol that was not represented in the chart’s key. I managed to figure out what it mean (increase a stitch, as it turns out), by looking at what the next or resulting row in the chart seemed to imply. Next I discovered that purling into what was a double yarn over on the previous row could not be done by just a P2. I decided to go with a purl front, purl back approach.
But the first real pain was the transition between “chart 2” and “chart 3”. After taking a shot at just working the first row of chart 3, it quickly became clear that there was a problem. After further review, I discovered a 50 stitch discrepancy between how many stitches I ended up with at the end of chart 2 (173) and how many the first row of chart 3 expected me to knit (123). I spent a solid hour (on a plane, a great place for this kind of focus) trying to figure out if I had made a mistake. (I hadn’t, at least, as the chart was written). Next I tried to figure out, if there was just an incorrect symbol in the first row of the chart. But with the change in repeats and complete shift in pattern, the math was not working out.
I finally figured out how to solve the problem and keep going. I determined that there would be 181 sts after working that first row of chart 3 (row 64) if I had indeed started with the prescribed stitch count (123). Since I was already close to that (I had 173) I decided to just knit the row, increasing the 8 sts evenly. Given the change in pattern, I decided it wouldn’t make enough of a difference. Being a lace chart, I chose yarn overs for the increase.
Then I spent another half hour calculating how many sts I would end up with at the end of half of the chart (I stopped at about half after I got tired, lol). Lace knitting often changes the total number of sts row to row, which makes it challenging to place markers between pattern repeats. This new shift in pattern was supposed to repeat 27 times, too, which would be a lot of markers. I also counted how many times I saw the pattern repeating in the pictures included in the pattern. It did not match what I saw the pattern specifying (not surprising). So like I said, free pattern, you get what you pay for.
Meanwhile, this chart is kind of poorly.. well charted. I am kind of OCD so I think I am going to take some more time to re-draw it better.
After figuring out this whole changing chart debacle, I continued to work on the piece. Later I was in a less focused environment, riding in the car with my husband driving and talking to me. By the time I picked it up again to work on it on the next plane ride, I noticed that something was very off. Things were not shaping up appropriately. I attempted to knit through it, at least to see if I could figure out what was wrong. It took to the end of the row and counting the 200+ stitches in the row a few times to see some of the problem areas. I ended up tinking two rows, placing markers (the little safety pin style ones) in areas that appeared to have problems, as well as capturing a couple of dropped stitches that happened when I tinked. At this point my rows were fluctuating between 239 and 268 sts. That is a bit of a task to tink. Especially with fuzzy, fingering weight yarn. Yes, thank you, I will take your accolades and “wow!”s. It was a feat. And I am proud that I went for it. It does not make this project go fast, but I have learned a lesson here. I need to only work on this project when I can really pay focused attention. Despite some pattern repeats being only 10 sts wide, without the help of markers, or a very well composed chart, there is an intense amount of cognitive load going on. I’m also very exhausted from everything on the trip I was on, so this is not the best time to be working on such a difficult project.
Hopefully you get the point of my story, which is to choose your projects wisely, but also choose your mental state and level of distraction while knitting particularly difficult or tedious projects wisely, and then you won’t have to do as much tinking. (Or any ripping, which if you know me, you know I am against). I’m guessing that actually many of you would have maybe given up and ripped out the project, or become too frustrated to continue. I would definitely understand. But in the end, there are also ways this could have been avoided (my pain, that is) other than not working the project at all.

For your sake, if you are worried about embarking on such a journey without support - well, don’t worry, just be mindful. And if you do need help, please reach out to me. Apparently I have this level of patience to solve these challenging debacles. :lol sob:

I am also dreaming about my pattern checker app, which would catch this kind of error (discrepancy in charts) ahead of time by performing some magical math checking. Unfortunately it doesn’t exist yet. And being only in chart form, would be pretty difficult to discover programmatically at present. :sad trombone:

But you _can_ check if the chart stitch counts match ahead of time. If you do decide to choose this route, here’s more detail about how I went about it.
Grab your favorite pad of paper and write down the row number of the chart. Next, you will count the number of sts in a row twice. First count how many sts there will be before you knit the row. To do this you don’t count yarn overs (since they get added when you work the row), and count decreases such as k2tog, ssk, p2tog, etc as 2 sts. (Obviously if you have k3tog, etc, count those as 3). Record this number in your notes next to the row number.
Next, count the number of sts that the row should have _after_ you work it. To do this, count yarn overs as one stitch, and k2tog, ssk, p2tog, etc as one stitch. After counting you should have written down something like this: Row 77: 239 -> 268. This tells you both stitch counts (before and after working) and how working the chart row changes that. Then when you go to start working that row, you can check your stitch count, as well as after.

Wishing you the best of luck this knitting season on your lace patterns! As mentioned, if you do run into issues, I am happy to help. Please reach out to me at genevieve@astraknots.com. Or you can submit my form for knitting help. Watch the video for How to Tink.

1 Comment

Coming back to your craft

12/27/2021

0 Comments

 
Picture
   Well I finally picked up the needles again after a several month hiatus. In all truthfulness, I took most of 2021 off from knitting. There were multiple reasons, including moving into my condo while we remodeled our new house. Despite bringing yarn and some small projects with me to the mountains, I didn't end up knitting at all! I also decided to invest more deeply in my dream of writing a book, participating in a program called 100 Day Book where you write your book (or a first draft) in 100 days! So that ended up consuming a lot of my focus and time. I also started a project for a friend, who also may have stopped talking to me completely (anyone else have this happen with some relationships this year?) so I'm not really sure what to do with the half finished project. It was a large project, and also one I was sort of improvising, so I got really stuck on it. 
  But now I've started knitting three scarves, two at a time of the same pattern in two different yarns, because I couldn't decide which yarn, and because I just can't do one thing at a time these days haha! I've always been like this. I don't like knitting things that are too easy either, I seem to get bored quickly. I like having several projects going at once. Similarly I'm reading like 5 different books at once too! 
Hoping that you are doing well, going easy on yourself if you decide to take breaks from things, especially if you are taking a break to find something new to do! 

0 Comments

Stashed for blast off!

1/5/2020

0 Comments

 
Picture
Happy New Year! Did you make resolutions? I'm working to set better goals this year. And even though it might be early, I've already got that "spring cleaning" bug. Or maybe it's just my love of organization. In any case, I decided to catalog my entire stash of yarn into Ravelry this holiday! 
Turns out, there is still a LOT of purple yarn in there! LOL. It IS my favorite color after all. But it felt good to revisit my whole stash, and now having it in digital form, I won't have to worry about inputting all those yarn details when I start new projects, I can just use from stash! 
This was actually a good follow on to the project I did last year where I reorganized my entire stash by yarn weight. I used to have it organized by color (yes, most of the bins held purple yarn, and there was a bin with all my orange and yellow together because I have so little of that!). But it was hard to know what I had and what weight things were when I wanted to start a project. I am very pleased with the result! 
In addition to this organizing project, I also queued up SEVERAL new projects I hope to complete this year. In fact, I have already finished a project that had been sitting in my Ravelry queue for a long time. It took me only about 5 hours to knit. Very excited :) [Here's the cowl I already completed in 2020!]
Other projects I have queued: sweater, several hats, boot toppers, fingerless gloves and spats! 
What projects are you planning? Have you organized your stash? Feel free to leave me some comments and let me know! Cheers!


0 Comments

Just Keep Knitting...

12/28/2019

0 Comments

 
I remember a long time ago when I picked up the phrase "just keep swimming". It was a coping mechanism for keeping going when things were getting rough, going tough, or needing improvement. 
But now, I've developed a new piece of advice I give my new knitters: Just Keep Knitting. New knitters make lots of mistakes. Think about the last time you learned something new - if you were doing it right you made a few mistakes in the beginning. That first meal you cooked, painting you painted, or skill you tried - there's no way it was perfect!
In fact, making mistakes (or Failing!) is the best way to learn. Usually you only get out of something what you put into it. So if you are trying hard and making big mistakes, you are doing something right (especially in the beginning). 
Many are impatient learning to knit. Who doesn't want to produce an awesome sweater on the first try? But it takes time, and patience, and most importantly - failure! 

I'm pretty excited, I want to tell you that I'm working on a brand new site where I can teach you how to knit, step by step. Stay tuned!

Failure sucks though. No one likes to mess up, get it wrong, or look foolish to others (even though you shouldn't be worrying about what others think!). But the beginning always looks messy. It doesn't take too long to learn to knit, and it will build your character to take a few days, weeks?, months? to learn :) 
​

0 Comments
<<Previous

    Author

    I started knitting in 2005, but have been crafting all my life. Knitting quickly became my obsession and I love to keep the needles in my hands as much as possible.  

    Archives

    April 2023
    January 2023
    December 2022
    November 2022
    December 2021
    January 2020
    December 2019
    November 2019
    July 2018
    June 2018
    May 2018
    April 2018
    March 2018
    August 2017
    August 2016
    February 2016
    January 2016
    August 2015
    July 2015
    June 2015

    Categories

    All
    Knitting Project Progress

    RSS Feed

Our Services

Company

Support

Knitting Help Video Index
Knitting Lessons
Online Knitting Classes
Free Knitting Patterns
Community Knitting

Shop
​
Blog-o-knots
Newsletter

Calendar
About Astraknots
Team of Astraknots
Contact Astraknots

Privacy Policy
​Terms of Use
Astraknots Policies
Astraknitopology
© Astraknots LLC 2012-2023. All rights reserved.